Introduction to AOS 3.5 GEP-F722 Flight Controller
The AOS 3.5 GEP-F722 flight controller is a high-performance board designed for racing drones, freestyle flying, and cinematic FPV applications. It offers advanced features, including an F7 processor, multiple UARTs, and enhanced filtering, making it ideal for demanding pilots who need precision and reliability. However, to get the best performance from this flight controller, proper soldering techniques must be applied. Poor soldering can lead to connectivity issues, signal interference, and even complete failure of your drone mid-flight.
This guide will provide a detailed, step-by-step approach to soldering the AOS 3.5 GEP-F722 correctly. Whether you are a beginner or an experienced builder, following these instructions will ensure a stable and long-lasting connection for your flight controller and other drone components.
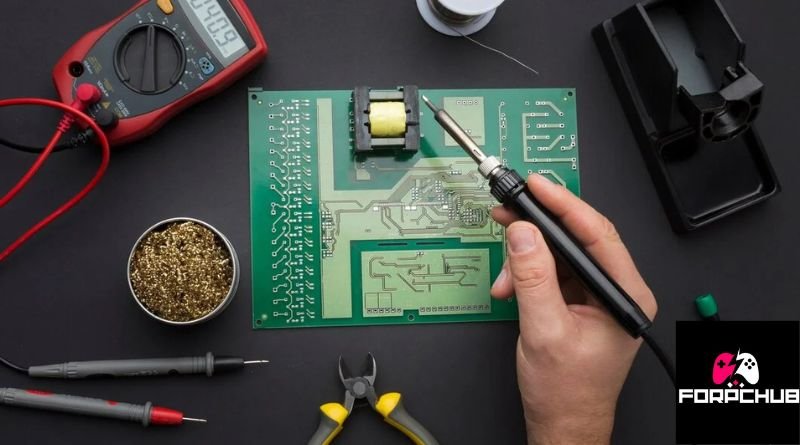
Tools and Materials Needed for Soldering
Before diving into the soldering process, gather all necessary tools and materials. Having high-quality tools will make the process easier and ensure strong, reliable connections.
- Soldering Iron: A temperature-controlled soldering iron (60W or higher) is recommended for precision.
- Solder: Use a high-quality 63/37 leaded solder for better flow and bonding.
- Flux: Helps improve solder adhesion and prevents oxidation.
- Solder Wick & Desoldering Pump: Useful for removing excess solder or correcting mistakes.
- Fine-tipped Tweezers: For holding small components and wires in place.
- Helping Hands or PCB Holder: Keeps the board steady while soldering.
- Heat Shrink Tubing: Provides insulation and protection for soldered connections.
- Multimeter: Ensures proper connections and checks for short circuits.
Preparing the AOS 3.5 GEP-F722 for Soldering
Proper preparation is crucial before applying solder to any flight controller. Follow these steps to ensure a clean and effective soldering process:
- Clean the PCB: Use isopropyl alcohol and a brush to remove any dust, oils, or residues from the flight controller’s solder pads.
- Tin the Soldering Iron Tip: Apply a small amount of solder to the tip of the iron to enhance heat transfer.
- Pre-Tin the Pads: Apply a small amount of solder to each pad before attaching wires. This ensures a stronger connection and reduces heat exposure to sensitive components.
Step-by-Step Guide to Soldering the AOS 3.5 GEP-F722
- Soldering the Power Connections
The power connection is one of the most critical solder joints on the flight controller. Follow these steps to solder the battery leads properly:
- Identify the positive (+) and negative (-) pads on the board.
- Strip about 3-5mm of insulation from the power wires (usually 12AWG or 14AWG).
- Twist the strands together and tin the exposed wire with solder.
- Heat the pad on the flight controller and apply a small amount of solder to pre-tin it.
- Place the wire onto the pad and apply the soldering iron until the solder melts and forms a solid joint.
- Let the joint cool naturally, avoiding movement that could create a weak bond.
- Soldering the ESC Connections
Electronic Speed Controllers (ESCs) need proper soldering to ensure a smooth and responsive throttle. Follow these steps:
- Locate the motor signal, ground, and power pads on the flight controller.
- Tin the motor signal and ground pads before attaching the ESC wires.
- Solder the ESC wires carefully, ensuring they do not bridge adjacent pads.
- Secure the connection with a bit of heat shrink tubing or electrical tape to avoid shorts.
- Soldering the Receiver (RX) Module
To ensure reliable radio control signal reception, solder the RX module properly:
- Identify the 5V, ground (GND), and signal (SBUS or CRSF) pads on the flight controller.
- Pre-tin these pads before attaching the receiver wires.
- Use thin wires (28-30AWG) for the receiver to minimize weight.
- Carefully solder each wire to the correct pad, ensuring a strong bond.
- Soldering the Video Transmitter (VTX) Module
A properly connected VTX ensures a stable video feed for FPV flights. Follow these guidelines:
- Identify the VTX power, ground, and video signal pads.
- Pre-tin both the pads and the VTX wires.
- Solder the wires one at a time, ensuring no short circuits between connections.
- Use zip ties or double-sided tape to secure the VTX and prevent wire stress.
- Soldering the Camera Module
The camera is essential for FPV pilots, and proper soldering ensures a clear video signal:
- Locate the video out, ground, and power pads on the flight controller.
- Tin the pads and the corresponding camera wires.
- Solder each wire carefully and verify the connections with a multimeter.
- Secure the camera wiring to prevent vibrations from affecting video quality.
- Checking for Short Circuits
Once all components are soldered, perform a thorough check before powering on:
- Use a multimeter in continuity mode to check for shorts between the positive and ground pads.
- Inspect all solder joints for cold solder or bridges.
- If any shorts are detected, use solder wick or a desoldering pump to correct them.
Best Practices for Reliable Soldering
- Use the right temperature: Set the soldering iron between 350-400°C for efficient soldering.
- Keep wires short and neat: This prevents clutter and signal interference.
- Avoid excessive solder: Too much solder can cause bridging and shorts.
- Secure components: Use zip ties or heat shrink tubing to protect delicate wires.
- Regularly clean the soldering iron tip: A dirty tip can lead to poor heat transfer and bad joints.
Conclusion
Proper soldering of the AOS 3.5 GEP-F722 flight controller is crucial for a high-performance drone. By following the step-by-step guide above, you can ensure strong electrical connections, minimize interference, and enhance the overall reliability of your drone. Investing time in meticulous soldering will pay off with a more stable, responsive, and long-lasting flight experience. Whether you’re a hobbyist or a professional pilot, mastering these soldering techniques will help you get the most out of your FPV drone setup.
May Also Red: forpchub